How to Add Hair Extensions to Box Braids
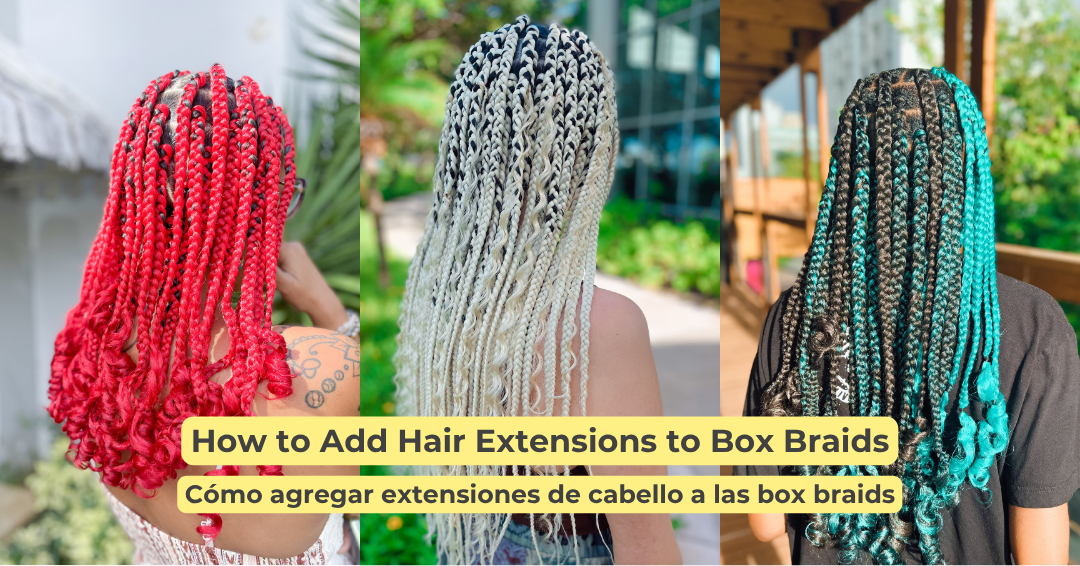
Box braids are among the most popular styles for creating unique braiding looks! As you become a professional braider, you must know how to add hair to braids. While you may find customers with medium or long hair who want their braids on natural hair only, many people ask for extensions. They are an immediate way to get the desired look while keeping the client’s hair protected and concealed.
How much do you already know about adding hair extensions to box braids? Don’t worry if you are just a beginner! In this article, I’ll tell you all you need to know about the different types of extensions—including which one is the most popular and why—the different installation methods, and other things to consider for better results. So keep reading to learn everything about adding extensions to braids for beginners!

Reasons to Add Hair to Box Braids
Why choose hair extensions if you are getting box braids? First, because of how fast they allow you to dramatically change a person’s hair length. I always tell my clients they can get box braids done with as little as a few inches of hair, and they can hardly believe it until they see the final results! Second, hair extensions let you play with colors without using harsh chemicals that can damage your hair. Third, because they are conveniently easy to look after.
As you can see, there is more than one reason why hair extensions are so popular, especially when a client wants to get box braids. However, not all hair extensions are the same! Let’s explore some of the possibilities they offer.
Synthetic Hair Extensions vs. Human Hair Extensions
When it comes to applying hair extensions to braids, the first thing to learn is that there are different materials for the extensions, which you can basically list under synthetic or real human hair. If you opt for the latter, Mel Moss, a hairstylist from Indianapolis, reminds us of the importance of using ethically sourced hair: You need to know that the hair you are using comes from a willing donor and not from someone whose ponytail was cut and stolen! Human hair extensions usually come from Asia and have different types depending on whether they come from a single donor or many.
While human hair extensions are chosen because of their durability (they can last up to a year) and their versatility (they can be styled as regular hair), they are way more expensive, and that’s why we professional braiders choose synthetic hair for braids. After all, even the best box braids won’t last over 12 weeks (advise your clients not to leave them past that time, since they can increase the risk of hair breakage).
As for synthetic hair extensions, they have many advantages besides the cost:
They are designed to look and feel exactly like human hair; they don’t look artificial, much less in braids!
They don’t lose their style because they are pre-heated.
They are available in a wide range of colors, textures, and lengths.
They are easy to maintain.
They resist natural elements such as wind, sun, or sand.

The Types of Hair Extensions for Box Braids
“Synthetic hair” is a huge label for hair extensions for braids, since you can find them in many different materials and qualities, each one serving different purposes. Let’s further explore your options:
Kanekalon
It’s the most popular synthetic fiber hair extension type for braids and cornrows. Its high quality makes it more expensive than other synthetic types but still more affordable than human hair. It feels natural to the touch and moves like human hair, unlike other types that look more artificial. Kanekalon offers a texture that reminds us of African hair; it looks great on updos, box braids, or voluminous ponytails.
Kanekalon has been around since 1957 when Kaneka first introduced the Hot Water Set technology. It allows the strands of hair to maintain their flexibility while preventing them from losing, and it’s flame-retardant, which not only makes it safer but also resistant to melting and dripping.
Toyokalon
It’s softer and silkier than other types of synthetic hair and won’t tangle as much as Kanekalon. Some people opt for this extension type for loose extensions, but when it comes to braids, I don’t believe the ease of detangling it offers much of an advantage.
Henlon
Also known as monofiber, Henlon has a high heat resistance and won’t shrink or lose its shape. It is easier to dye than Kanekalon, so it comes in a wide variety of colors. However, it won’t last as long as Kanekalon extensions. You can choose it for festival braids, which aren’t supposed to last as long as regular box braids—or to look as natural either!
Spectra
This is a good alternative for hair extensions for braids because they can be recycled, making them eco-friendly and perfect for reducing your carbon footprint. Another advantage is the antibacterial property, which makes it less itchy. Spectra is mostly used on crochet braids. Unfortunately, it isn’t as easy to find in shops as Kanekalon.
How to Add Hair to Braids: Different Installation Methods
Just as you’ll find different types of hair extensions for braids, there are many ways to add hair extensions to box braids. My advice is to choose an installation method and stick with it! It’s always better to master one technique than to have just a general knowledge of all the different ways but not be excellent in any of them. Let’s see some:
The Rubber Band Method
This method is perfect for beginners as it doesn’t require advanced braiding skills or knowledge about any standard hair installation method. You do it this way:
Divide the section of hair.
Split the section in half.
Place the extensions in the middle.
Wrap the client's hair around the extensions.
Secure it by tying a rubber band.

The Traditional Method
This is the most common way hair braiders attach hair to braids. Here are the steps for this method:
Divide the section of hair: Start by parting the section of natural hair that you want to braid.
Wrap the extensions around the client's hair: Place the extensions around the base of the client's hair, making sure they are securely in place.
Twist the extensions to create three strands: Twist the extensions so that you have three strands to work with—two strands of extensions and one of the client's natural hair.
Begin the first intersection using the three-strand braiding pattern. Start braiding by using the three-strand technique, where you cross one strand over the other to create the braid.
Perform the union: Before completing the first intersection, split one of the extension strands in half. Combine this split section with the client's natural hair strand. This union will help maintain a tight grip on the braid.
Continue the braid using the three-strand method: After the union, proceed with the braiding using the traditional three-strand method until you reach the desired length.
This description maintains clarity and flow while explaining the process step by step, but you can also see the method in this video. Let me know if you need further details or adjustments!
The Feed-In Method
This method creates a seamless braid that gradually thickens as more hair is added, resulting in a natural appearance. This is how you achieve it:
Start the braid with the client's natural hair: Begin by using the three-strand braiding pattern with the client's natural hair, creating the base of the braid.
Add the first thin strand of extension hair: After completing the first intersection of the braid, take a small piece of extension hair and add it to one of the three strands.
Continue adding or "feeding in" hair: As you continue braiding, gradually feed in additional thin strands of extension hair, one by one, ensuring they blend smoothly with the natural hair.
Achieve the desired thickness: Keep adding hair until the braid reaches your desired thickness, maintaining an even and natural look throughout the process.

The Three-Strand Braid Method Explained
To install extensions on box braids, I believe the union needs to be done as early as possible to ensure the braid remains in place. Check out my video tutorial! I do it with the traditional method as explained above. After this, you can go on with the three-strand braid technique, which I do as follows:
Use your index finger, middle, and thumb.
Begin with three strands of hair and hold the two outer strands with your index and middle finger.
Grab the middle strand with your index and thumb and twist your hand in an outward motion.
Reset your hand by bringing your index finger forward.
Again, grab the middle strand with your index finger and thumb.
Twist your hand in an outward motion.
Keep repeating this pattern to obtain beautiful braids!
Depending on the desired look, you can braid up to the end or leave some hair loose. Check out this other video tutorial for better clarity.
I hope that by now, after reading this, you have learned how to add hair extensions to box braids and are feeling confident in your newly acquired skills. In any case, remember that practice makes perfect! Using a mannequin head, practicing with your own hair, or with a close friend before you attempt the technique with your clients will help you master the skill and get nothing but professional results.
I’m happy to help fellow braiders succeed in their braiding business! Now that you know how to add hair to braids, I invite you to keep learning: Download my Free Box Braid Guide and get hands-on with those hairstyles right away!
Sources:

(Spanish Version)
Cómo agregar extensiones de cabello a las box braids
¡Las box braids se encuentran entre los estilos más populares para crear estilos de trenzado únicos! A medida que te conviertes en un trenzador profesional, debes saber cómo agregar cabello a las trenzas. Si bien es posible encontrar clientes con cabello medio o largo que quieran sus trenzas solo en cabello natural, muchas personas piden extensiones. Son una forma inmediata de conseguir el look deseado manteniendo el cabello del cliente protegido y disimulado.
¿Cuánto sabes ya sobre cómo agregar extensiones de cabello a las box braids? ¡No te preocupes si eres principiante! En este artículo, le contaré todo lo que necesita saber sobre los diferentes tipos de extensiones (incluido cuál es el más popular y por qué), los diferentes métodos de instalación y otras cosas a considerar para obtener mejores resultados. ¡Sigue leyendo para aprender todo sobre cómo agregar extensiones a las trenzas para principiantes!
Razones para agregar cabello a las box braids
¿Por qué elegir extensiones de cabello si vas a hacerte box braids? Primero, por la rapidez con la que te permiten cambiar drásticamente la longitud del cabello de una persona. Siempre les digo a mis clientes que pueden hacerse box braids con tan solo unos pocos centímetros de cabello, ¡y apenas pueden creerlo hasta que ven los resultados finales! En segundo lugar, las extensiones de cabello te permiten jugar con los colores sin utilizar productos químicos agresivos que puedan dañar tu cabello. En tercer lugar, porque son convenientemente fáciles de cuidar.
Como puede ver, hay más de una razón por la que las extensiones de cabello son tan populares, especialmente cuando un cliente quiere hacerse box braids. Sin embargo, ¡no todas las extensiones de cabello son iguales! Exploremos algunas de las posibilidades que ofrecen.
Extensiones de cabello sintético versus extensiones de cabello humano
Cuando se trata de aplicar extensiones de cabello a las trenzas, lo primero que debes aprender es que existen diferentes materiales para las extensiones, que básicamente puedes enumerar como cabello humano sintético o real. Si opta por lo último, Mel Moss, una estilista de Indianápolis, nos recuerda la importancia de utilizar cabello de origen ético: debe saber que el cabello que está utilizando proviene de un donante dispuesto y no de alguien cuya cola de caballo fue cortada y ¡robado! Las extensiones de cabello humano suelen proceder de Asia y tienen distintos tipos según procedan de un único donante o de muchos.
Si bien las extensiones de cabello humano se eligen por su durabilidad (pueden durar hasta un año) y su versatilidad (se pueden peinar como cabello normal), son mucho más caras y es por eso que las trenzadoras profesionales elegimos cabello sintético para las trenzas. Después de todo, incluso las mejores box braids no durarán más de 12 semanas (aconseja a tus clientas que no las dejen pasar ese tiempo, ya que pueden aumentar el riesgo de quiebre del cabello).
En cuanto a las extensiones de pelo sintético, tienen muchas ventajas además del coste:
Están diseñados para verse y sentirse exactamente como el cabello humano; ¡No parecen artificiales y mucho menos con trenzas!
No pierden su estilo por estar precalentados.
Están disponibles en una amplia gama de colores, texturas y longitudes.
Son fáciles de mantener.
Resisten elementos naturales como el viento, el sol o la arena.
Los tipos de extensiones de cabello para box braids
“Cabello sintético” es una etiqueta enorme para extensiones de cabello para trenzas, ya que puedes encontrarlas en muchos materiales y calidades diferentes, cada una de las cuales sirve para diferentes propósitos. Exploremos más a fondo sus opciones:
Kanekalon
Es el tipo de extensión de cabello de fibra sintética más popular para trenzas y trenzas. Su alta calidad lo hace más caro que otros tipos sintéticos pero aún más asequible que el cabello humano. Se siente natural al tacto y se mueve como cabello humano, a diferencia de otros tipos que parecen más artificiales. Kanekalon ofrece una textura que nos recuerda al cabello africano; queda genial en peinados recogidos, box braids o coletas voluminosas.
Kanekalon existe desde 1957, cuando Kaneka introdujo por primera vez la tecnología Hot Water Set. Permite que los mechones de cabello mantengan su flexibilidad evitando que se caigan, y es retardante de llama, lo que no solo lo hace más seguro sino también resistente a derretirse y gotear.
Toyokalón
Es más suave y sedoso que otros tipos de cabello sintético y no se enreda tanto como Kanekalon. Algunas personas optan por este tipo de extensión para extensiones sueltas, pero cuando se trata de trenzas, no creo que la facilidad para desenredarlas sea una gran ventaja.
Henlon
También conocida como monofibra, Henlon tiene una alta resistencia al calor y no se encoge ni pierde su forma. Es más fácil de teñir que Kanekalon, por lo que viene en una amplia variedad de colores. Sin embargo, no durará tanto como las extensiones Kanekalon. Puedes elegirlo para trenzas de festivales, que se supone que no duran tanto como las box braids normales, ¡o tampoco parecen tan naturales!
Spectra
Esta es una buena alternativa a las extensiones de cabello para trenzas porque pueden reciclarse, lo que las hace ecológicas y perfectas para reducir tu huella de carbono. Otra ventaja es la propiedad antibacteriana, que hace que piquen menos. Spectra se usa principalmente en trenzas de crochet. Desafortunadamente, no es tan fácil de encontrar en las tiendas como Kanekalon.
Cómo agregar cabello a las trenzas: diferentes métodos de instalación
Así como encontrarás diferentes tipos de extensiones de cabello para trenzas, hay muchas formas de agregar extensiones de cabello a las box braids. ¡Mi consejo es elegir un método de instalación y atenerte a él! Siempre es mejor dominar una técnica que tener sólo un conocimiento general de todas las diferentes formas pero no ser excelente en ninguna de ellas. Veamos algunos:
El método de la banda elástica
Este método es perfecto para principiantes, ya que no requiere habilidades avanzadas de trenzado ni conocimientos sobre ningún método estándar de instalación del cabello. Lo haces de esta manera:
Divide la sección de cabello.
Divide esa sección por la mitad.
Coloca las extensiones en el medio.
Envuelve el cabello del cliente alrededor de las extensiones.
Asegúralo atando una banda elástica.
El método tradicional
Esta es la forma más común en que los trenzadores unen el cabello a las trenzas. Estos son los pasos para este método:
Divide la sección de cabello: Comienza separando la sección de cabello natural que deseas trenzar.
Envuelve las extensiones alrededor del cabello del cliente: Coloca las extensiones alrededor de la base del cabello del cliente, asegurándose de que estén firmemente en su lugar.
Gira las extensiones para crear tres mechones: Gira las extensiones para tener tres mechones con los que trabajar—dos mechones de extensiones y uno de cabello natural del cliente.
Comienza la primera intersección usando el patrón de trenzado de tres hilos. Comienza a trenzar usando la técnica de tres hilos, donde cruzas un hilo sobre el otro para crear la trenza.
Realiza la unión: Antes de completar la primera intersección, divide uno de los hilos de extensión por la mitad. Combina esta sección dividida con el mechón de cabello natural del cliente. Esta unión ayudará a mantener un agarre firme de la trenza.
Continúa la trenza mediante el método de tres hilos: Después de la unión, procede con el trenzado mediante el método tradicional de tres hilos hasta alcanzar el largo deseado.
Esta descripción mantiene la claridad y la fluidez al tiempo que explica el proceso paso a paso, pero también puedes ver el método en este vídeo. ¡Avíseme si necesita más detalles o ajustes!
El método de alimentación
Este método crea una trenza sin costuras que se espesa gradualmente a medida que se agrega más cabello, lo que da como resultado una apariencia natural. Así es como lo logras:
Inicia la trenza con el cabello natural de la clienta: Comienza utilizando el patrón de trenzado de tres hebras con el cabello natural de la clienta, creando la base de la trenza.
Agrega el primer mechón fino de cabello de extensión: después de completar la primera intersección de la trenza, toma un pequeño mechón de cabello de extensión y agrégalo a uno de los tres mechones.
Continúa agregando o "alimentando" cabello: a medida que continúa trenzando, introduce gradualmente mechones finos adicionales de cabello de extensión, uno por uno, asegurándote de que se mezclen suavemente con el cabello natural.
Logra el grosor deseado: sigue agregando cabello hasta que la trenza alcance el grosor deseado, manteniendo una apariencia uniforme y natural durante todo el proceso.
Explicación del método de la trenza de tres hilos
Para instalar extensiones en box braids, creo que la unión debe realizarse lo antes posible para garantizar que la trenza permanezca en su lugar. ¡Mira mi vídeo tutorial! Lo hago con el método tradicional como expliqué más arriba. Después de esto, puedes continuar con la técnica de la trenza de tres hilos, que hago de la siguiente manera:
Utiliza tu dedo índice, medio y pulgar.
Comienza con tres mechones de cabello y sostén los dos mechones exteriores con el dedo índice y medio.
Agarra el mechón del medio con el índice y el pulgar y gira la mano con un movimiento hacia afuera.
Reinicia tu mano llevando tu dedo índice hacia adelante.
Nuevamente, agarra el mechón del medio con el dedo índice y el pulgar.
Gira tu mano con un movimiento hacia afuera.
¡Sigue repitiendo este patrón para obtener hermosas trenzas!
Dependiendo del look deseado, puedes trenzar hasta el final o dejar algo de cabello suelto. Mira este video tutorial para mayor claridad.
Espero que a estas alturas, después de leer esto, hayas aprendido cómo agregar extensiones de cabello a las box braids y te sientas seguro de tus habilidades recién adquiridas. En cualquier caso, ¡recuerda que la práctica hace la perfección! Usar una cabeza de maniquí, practicar con tu propio cabello o con un amigo cercano antes de intentar la técnica con tus clientes asegurará que domines la habilidad y obtengas solo resultados profesionales.
¡Estoy feliz de ayudar a otros trenzadores a tener éxito en su negocio de trenzado! Ahora que sabes cómo agregar cabello a las trenzas, te invito a seguir aprendiendo: ¡descarga mi Guía gratuita de Box Braid y ponte manos a la obra con esos peinados de inmediato!