How To Braid: 3 Parting Hacks for Creating Middle Parts, Zig Zags and Curved Lines

Hello, Sunnies! Are you here to learn how to braid like a pro? Maybe you’ve already attempted braiding on your own, but you come up with loose, uneven braids. Perhaps you’re used to braiding the same kind of braids every time, and you want to learn how to braid new hairstyles. Or this may be your first attempt at braiding, and you want to start from scratch! In any case, you’ve come to the right place.
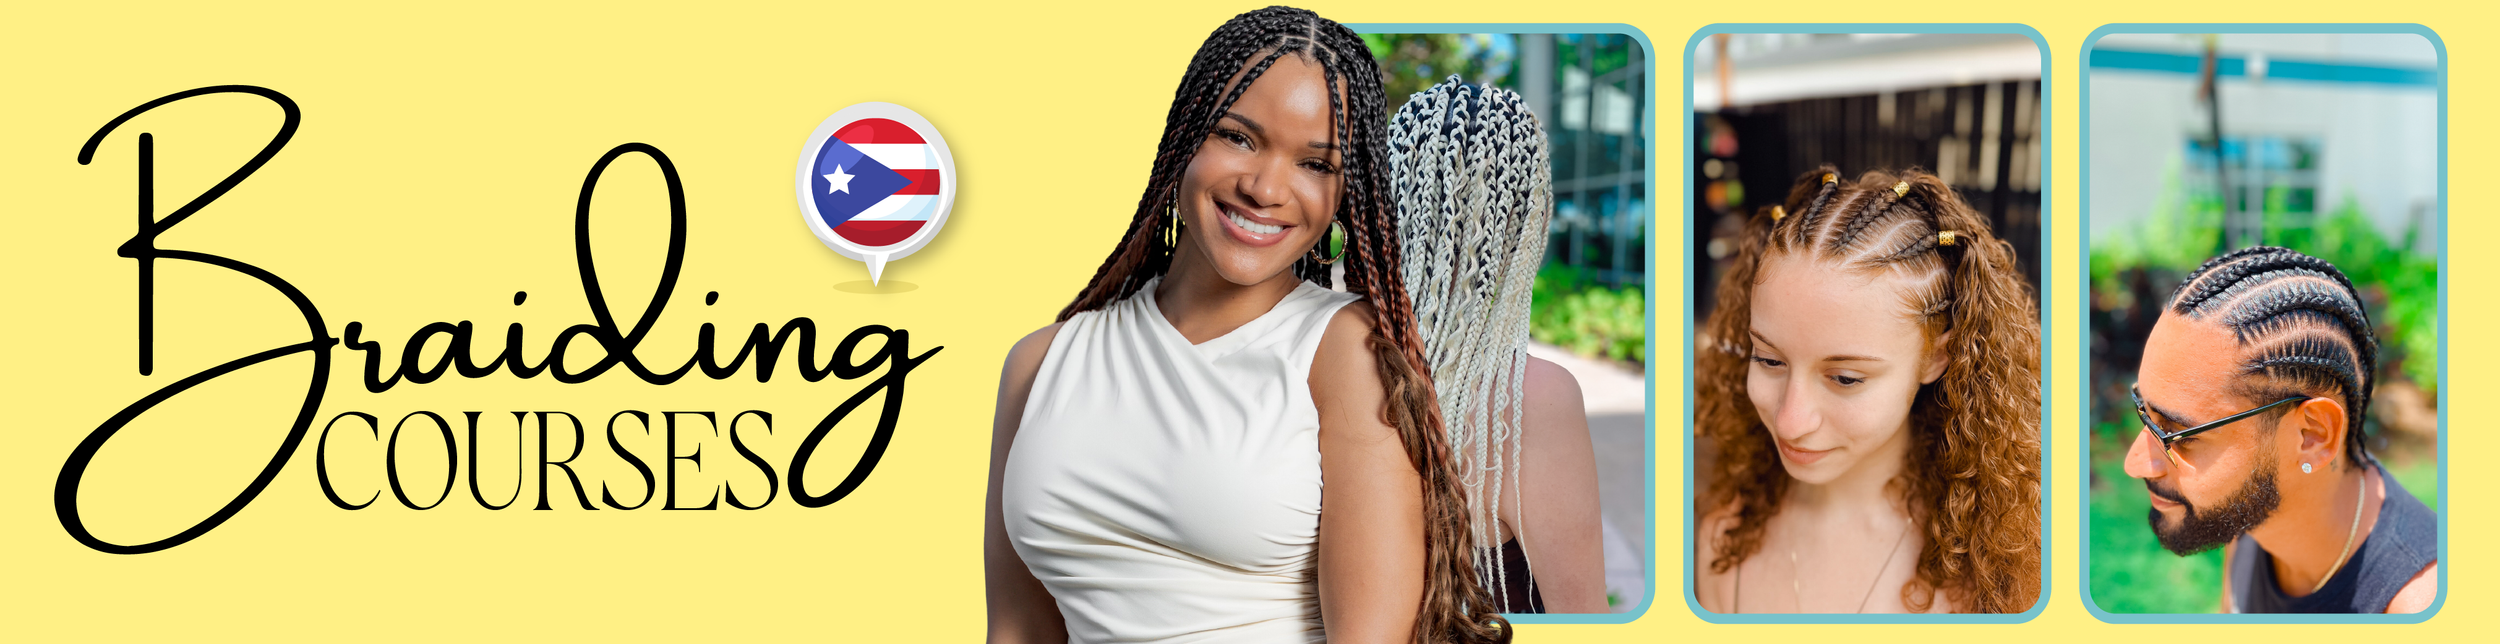
In Sunny Braids, Puerto Rico’s #1 braiding studio, we’ve developed a system built on 5 core actions. You know which one is Action 1? That’s right: PARTING! No matter if you’re braiding box braids, cornrows, hair twists, or any other style, everything starts with the part. Only by achieving a clean, precise part will you get professional results. Skip this, and instead of salon-done braids, you’ll get messy-looking braids that don’t last.
In this article, you are going to learn some secrets behind creating clean, professional braids, thanks to spotless partitions:
middle parts (great for two braids, cornrows, and other popular styles)
zig zags (which provide a unique look that enhances any style)
curved lines (I use them a lot in festival braids!)
But that’s not all! At the end, you’ll find a special invitation to get FREE training. Keep reading, and I’ll share with you my best parting hacks to create straight, even sections every single time. So grab your rat-tail comb and start practicing!
You Can’t Learn How to Braid Without Learning How to Part First
You may wonder about the importance of a good hair part. “After all, aren’t braids themselves more important? Who needs to care so much about partitions if my braids are gorgeous?” Trust me on this one: Parts are the foundations of braids. It’s the secret to transforming messy hair into a literal work of art that will turn heads everywhere you go. In other words: Great braids start with a perfect part.
Therefore, as a braider, you must do your best to achieve a nice, clean part if you want to achieve a truly professional look. And yes, this also applies if you’re a parent learning to braid your kids before picture day at school!
What You Need to Part Hair Like a Pro
If you’re braiding someone with thin, straight hair, it’s possible to create parts using just your fingers and nails. Still, I always recommend that you invest in a good professional braiding comb, hairpins or elastic bands, and braiding gel. You’ll need them for most hair types.
With the rat tail of your braiding comb, you’ll create your part.
Afterwards, you spread gel to perfect it.
The pin tail of your braiding comb is for making the part precise and clean.
Finally, you’ll use the hairpins or elastic bands to keep hair parts in place as you braid.
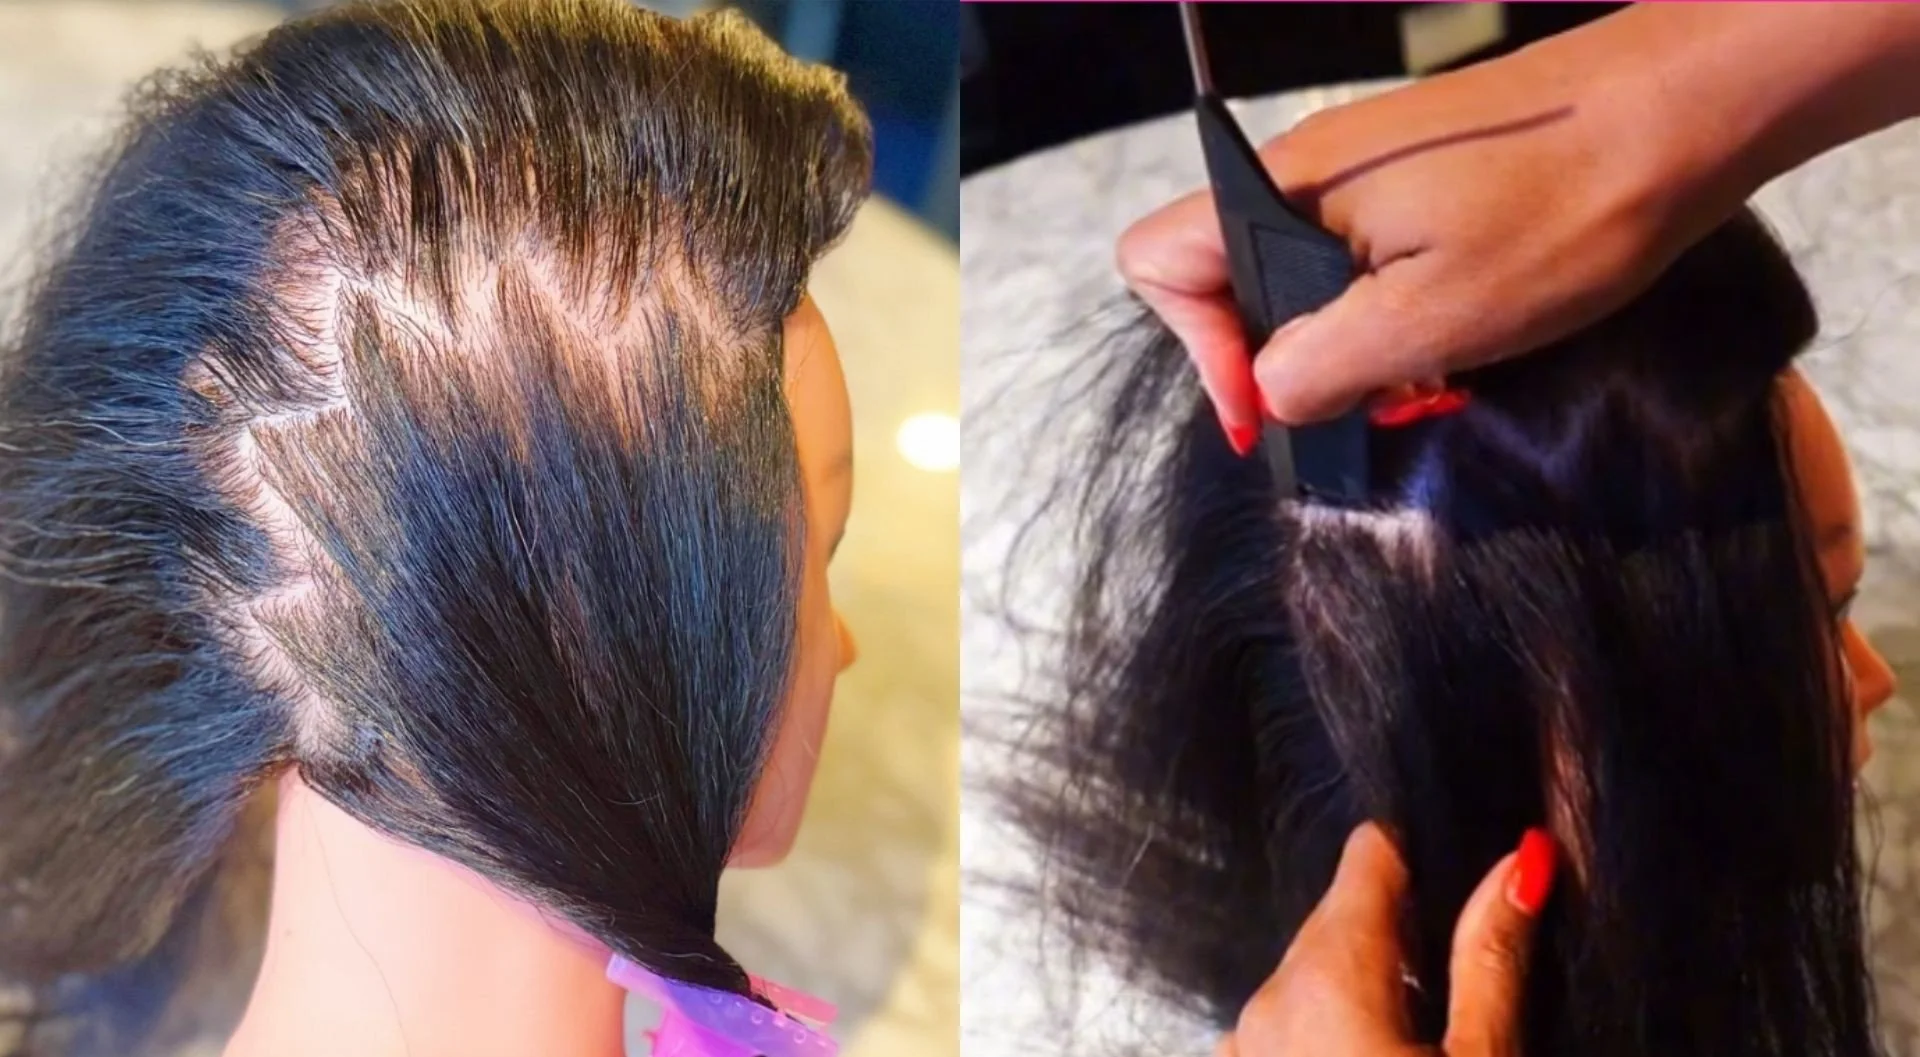
Hack #1: Create a Great Middle Part
Okay, so this is the first trick you need to master. The middle part is the foundation of many classic hairstyles. Before moving on to complex designs such as zig-zag lines or heart braids, practice middle parts until you get them right. Practice, practice, and practice!
If you’re learning how to braid hair, nothing is more important than achieving the exact middle part, because many braided hairstyles need it. Think about two braids, six or eight cornrows, or some box braids—although not mandatory, as many professional braiders opt for a bricklayer parting pattern, others begin their box braids with a middle part to achieve balance and symmetry in their hairstyles.
So, How to Create the Perfect Middle Part?
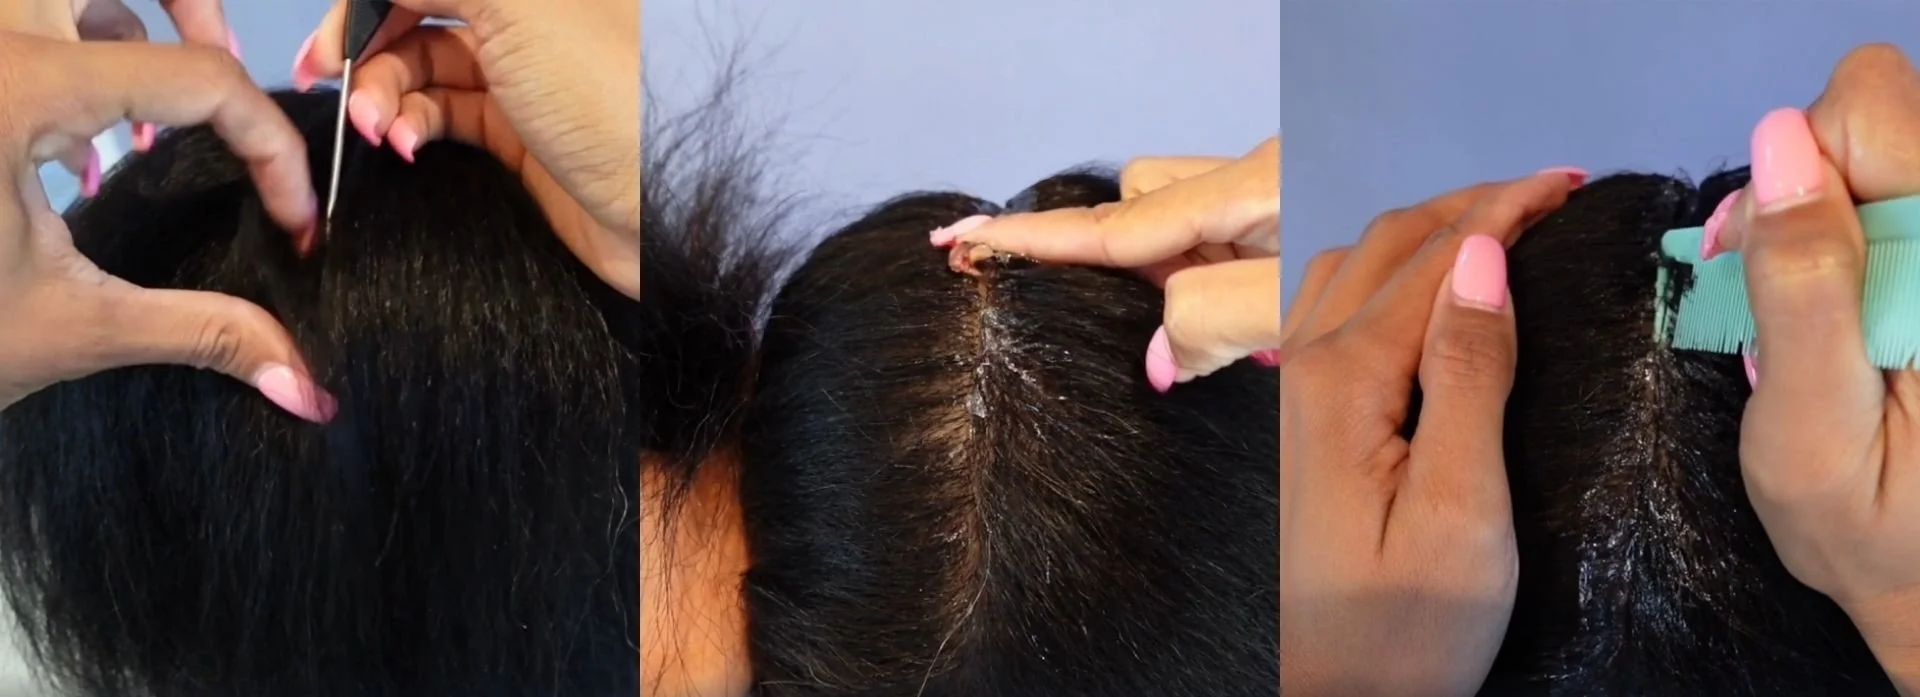
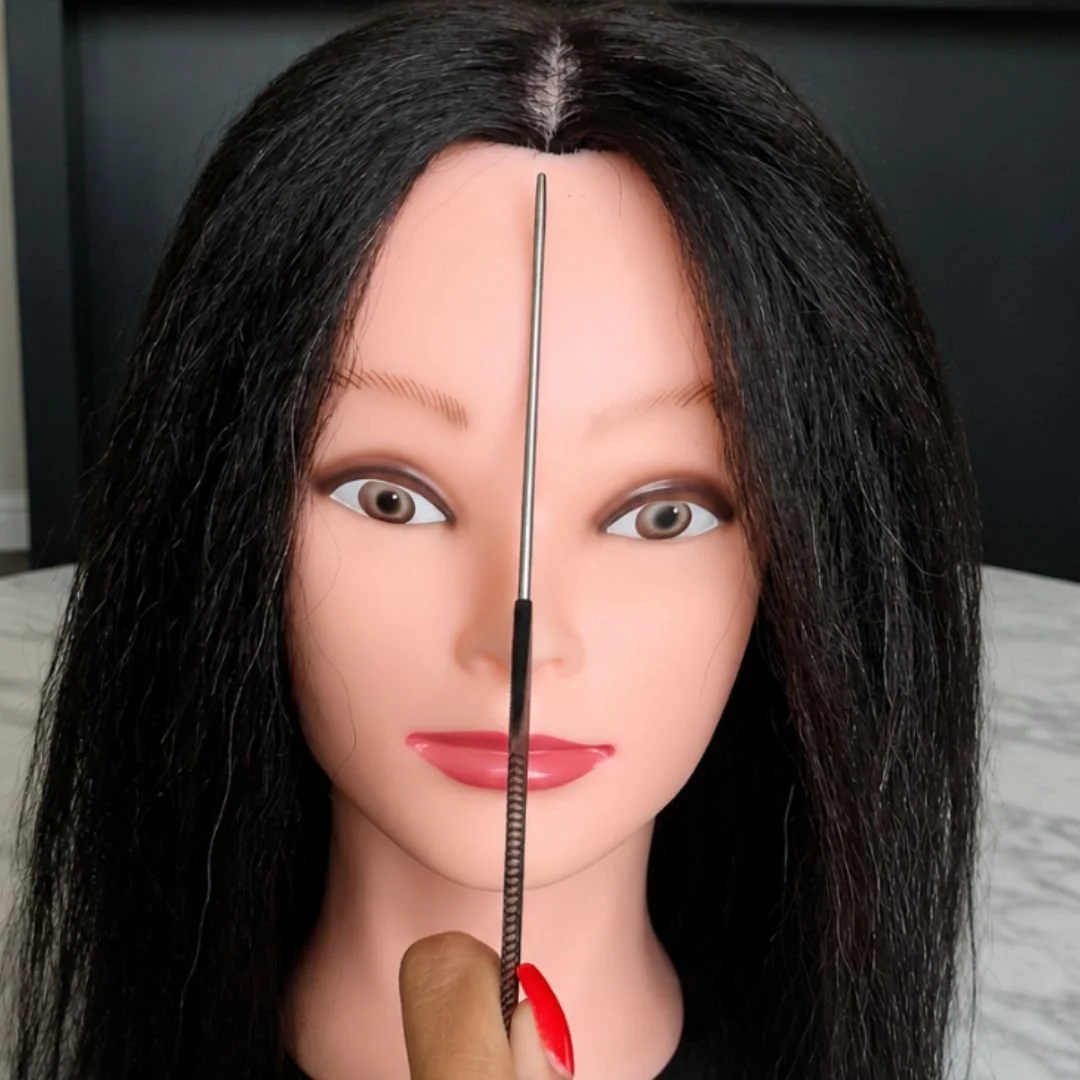
To create a balanced, neat middle part, begin by combing your client’s hair, facing their front. As you stand looking at their face, you want to align your braiding comb from their nose to the top of their head to find the exact middle point of the hairline in the forehead.
Then, you’ll move around the client’s head to do the same from the back. You just have to eyeball the exact middle point of your client’s nape of the neck.
Now it’s time to firmly grab your braiding comb by the ridges.
Using the rat tail of the braiding comb, you’ll evenly part your client’s hair by connecting the front middle point with the back middle point. First, trace the part that goes from the exact center of the forehead to the top of the head.
Then, continue the part from the top to the head to the exact middle point of the nape.
Check out your work so far. How does it look? Is it balanced? Now it’s the time to correct if necessary.
Once you’re pretty satisfied with the result, perfect your middle part by applying gel on that trace. You can spread some product with your fingers.
After applying gel, you clean the part with the precision end of your braiding comb. Wipe it properly first to make sure it’s super clean and not messy.
That’s how you basically trace a middle part! Have you got any questions? I’ll be happy to answer them! Keep reading to find out how to get a free training lesson.
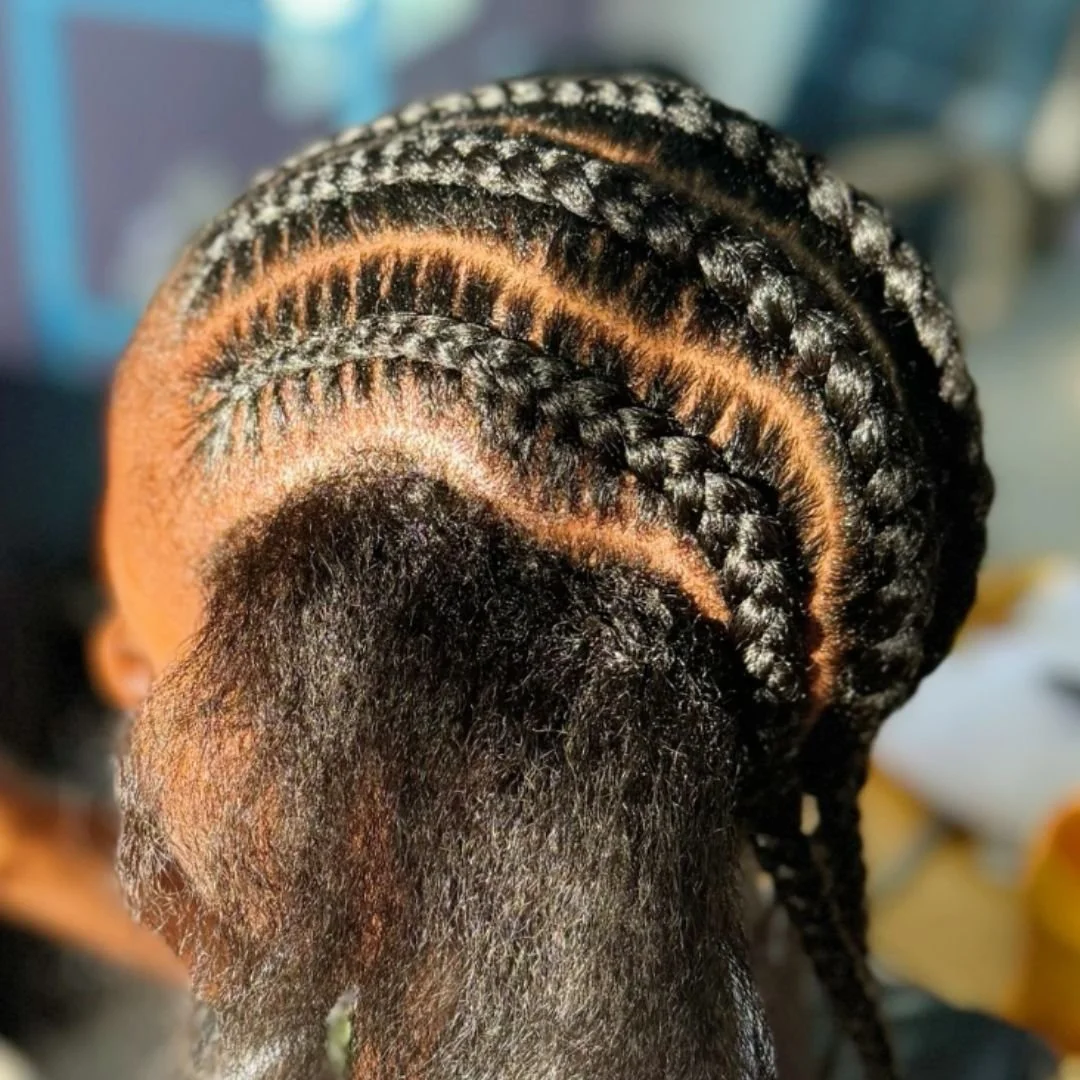
Hack #2: How to Create Zig-Zag Parts
After achieving a balanced middle part, are you willing to upgrade your braided hairstyles? If a clean, professional, straight part is the foundation of any classic look, a zig-zag part is a deliberate statement. I love zig-zags because they instantly break up the symmetry of standard braiding, turning exposed scalp into a geometric design that stands out on its own.
The zig-zag parts work great with many braided hairstyles, such as sharp stitch braids, feed-in cornrows, or playful double Dutch braids (space buns), where these dramatic lightning-bolt lines add texture and an unmistakable Millennium-inspired, high-fashion edge. Zig-zags can be a great addition to festival braids if you ask me!
When you begin a braided hairstyle with zig-zag parts, just by shifting the lines from predictable to dynamic, you elevate even the simplest braided hairstyle into an amazing, custom masterpiece that will guarantee you capture every look.
Hands On: Create Zig-Zag Parts
Whether you are turning a middle part into a zig-zag part, or if you want to create several zig-zag parts for your braids, you always begin by creating a short straight part.
Use the rat tail of your braiding comb to create a V shape.
Go on parting the hair in a bunch of even V shapes of your desired size, until you get the zig-zag part complete.
As you did with the middle part, check your work and correct if necessary.
Apply the gel and clean up to obtain a nice, clean zig-zag part.
I know it seems that doing a zig-zag part was more difficult than creating the perfect middle part, but here’s a little secret: While a middle part demands you to be absolutely precise, a zig-zag part is much more forgiving, effortlessly hiding minor mistakes within its sharp, shifting lines.
Hack #3: How to Create Curvy and Wavy Parts
Just like a straight part is the foundation and a zig-zag is a statement, I love curvy or wavy parts because they are pure creativity. Curvy parts soften the entire look, turning the exposed scalp into organic lines that mimic waves—perhaps that’s why they look so great in beach braids! This technique breaks away from rigid structures, adding a sense of movement, rhythm, and a hypnotic feel to the hair before you even start braiding.
How do you use it? Curvy parts work beautifully with feed-in cornrows, goddess braids, or lemonade styles, where the flowing lines seamlessly complement the natural curves of the head. They are also a massive hit for festival braids—they go great with colorful extensions, bubbles, or glitter-slicked roots.
Let’s Learn How to Create Curvy Parts
Start by combing the hair thoroughly to ensure it's completely detangled and smooth.
Place the metal tip of the rat tail of your braiding comb at the hairline and glide it backward in a smooth, continuous S-shape motion (or a series of C shapes, upward and downward).
Depending on how smooth or curvy you want it, you design your part until you find your desired curve. Don't overthink it! Let your wrist guide the curve.
Gently separate the hair along the wave you just drew.
Add some gel along the curved line, and clean up the edges with the precision end of the braid, locking that beautiful wave into place.
Again, I know drawing a perfectly smooth curve might feel a bit intimidating at first, but here’s the best part: just like zig-zags, curvy parts are incredibly forgiving. Because the eye naturally follows the fluid, rolling motion of the wave, any tiny uneven snags or minor asymmetries completely disappear into the flow.
Final Invitation: FREE Braiding Webinar!
So there you go! These are just three of my many parting cheat codes. I hope you liked them!
Wait: Do you want to learn more?
Here’s a special surprise for you: Besides our presencial training courses in our studio, I’m offering FREE WEBINARS to people everywhere who want to learn how to braid! Learn all the secrets of the system that we apply in Sunny Braids, Puerto Rico. Over 3,000 clients recommend us!
Sign up for the Webinar today and join us for free training. No matter what your current expertise is, you too can learn how to braid head-turning braids.